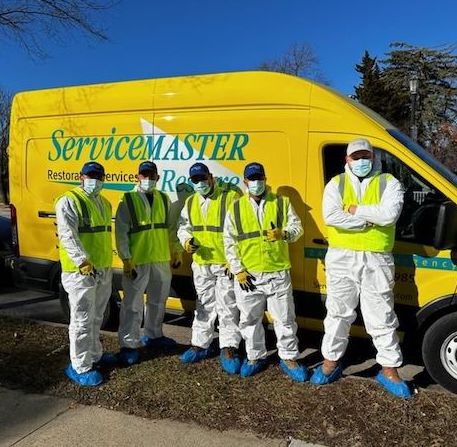
DIY Mold Removal: 7 Steps to Effectively Eliminate Mold
By: Diana Rodriguez-Zaba Updated on: March 13, 2019
It only needs a little moisture and temperatures between 40 and 100 degrees Fahrenheit. Give it 48 hours, and mold goes on a growth spurt that results in structural damage and compromised indoor air quality. As it spreads, it gets harder to clean and more expensive to remove.
You know by now that mold is not an easy problem to tackle. Working harder is most likely not the solution against the army of mold spores you’re up against. You need a smart and safe DIY approach. But how do you get started without immediately calling in mold experts?
If you’re facing this unhealthy problem in your home and thinking about DIY mold remediation, the following 7 steps will definitely help you!
Do It Yourself Mold Cleanup Steps
1. Assess the Area
There are different warning signs for mold in your home, but it’s most often detected by its unpleasant odor. This occurs with large concentrations in hidden spaces, so take a close look at walls and surfaces and inspect these areas.
Mold causes irregularities in the material where it grows, and it stains areas as it spreads. Splotches of green, brown or black are sure indications that unhealthy mold is quickly making its way through wood and sheet rock.
2. Gear Up
Because mold removal poses serious health threats, professional home cleaning services always use protective gear. If you’re going the DIY route, it’s very important that you take the same precautions. You’ll need an OSHA-rated face mask or respirator, preferably one that’s rated for black mold removal. You’ll also want to wear disposable coveralls, protective gloves and non-vented goggles.
3. Secure the Room
Before you begin to work, close doorways, and preferably seal them with sheets of 6-millimeter plastic. This helps minimize the spread of airborne mold spores through your home (which prevents issues later on). Open windows, and ventilate the room with old box fans that blow contaminated air outside. After you finish your project, dispose of the fans because the blades will be covered with mold spores.
4. Eliminate the Source
Every mold remediation job starts by identifying the source of moisture that allows unhealthy growth. Locate the problem, perform necessary repairs, and thoroughly dry the area. Whether it’s leaky plumbing in the walls, AC condensation in the attic or worn seals around windows sashes, you have to eliminate all moisture sources so that mold doesn’t return.
5. Determine Your Problem’s Size
Uncover how far the mold has spread by removing affected materials.
We always advise homeowners who want tips on DIY mold removal strategies to take out as much affected material as possible. You need an accurate overview of how far the problem has spread, so you may have to pull up carpets and remove baseboards.
Our teams have addressed mold in surprising locations including chimneys, front-loading washing machines and refrigerator drip pans.
6. Choose the Best Approach
Eliminating mold is a big job, it’s time-consuming, and it can affect your health. We advise that you only tackle mold removal if:
• The affected area is no larger than 3 square feet.
• The surface material is easy to clean.
• You don’t suffer from any respiratory problems (already).
If your project doesn’t meet these three conditions, don’t put your health in danger by trying to eliminate the mold yourself.
7. Know Your Enemy
Dab a few drops of bleach on suspected mold to determine if it might be simple mildew. If the tested area becomes lighter in a few minutes, you’re in luck. It’s most likely mildew, which usually can be removed pretty easily. If the tested area doesn’t become lighter, then you’re probably dealing with Aspergillus, Cladosporium or dangerous Stachybotrys atra, better known as black mold. Contact a service that specializes in mold testing so that you can take the safest course of action.
8. Our Bonus DIY Tip
Most homeowners don’t realize how long it takes to thoroughly dry treated areas. Even though you eliminate the source of moisture that gives mold a foothold, it can take wood and sheetrock several days to completely dry.
If the weather cooperates, leave windows open in the affected room. Set up fresh fans to circulate the air, and consider bringing in dehumidifying equipment. If you’re sure that you want to attack a mold problem on your own, take a look at our earlier post outlining three methods for killing mold.
When to Get Help from Mold Remediation Pros
It only takes two days and a little damp for airborne mold spores to turn into a serious problem, so always address any water damage to your property right away. If you aren’t comfortable with DIY mold strategies, contact our professionals here at ServiceMaster Restoration by Zaba.
We offer certified mold inspections and mold removal for Chicago homes and businesses, and we’re always here to help, so just give us a call at 773-647-1985.