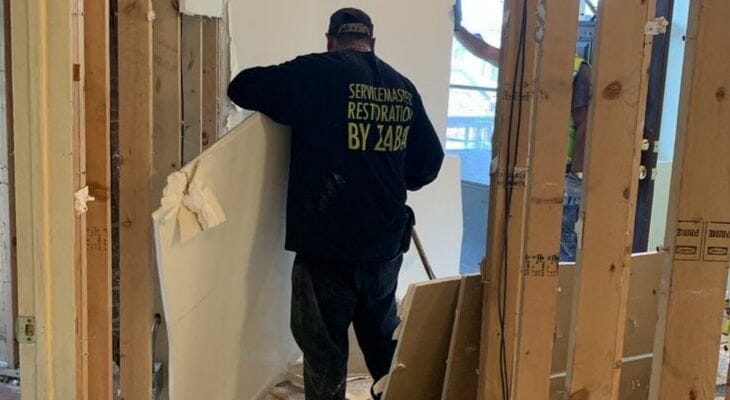
At ServiceMaster Restoration by Zaba, we have over 85 years of combined experience in the water damage restoration industry.
In this comprehensive guide, we’ve compiled our best tips to help you assess the damage, dry your walls after a leak, and get the help you need to restore your home.
Key Takeaways
- To repair damaged drywall, remove furniture and other items from the affected area, remove molding and baseboards, drain standing water from the walls, gauge the extent of the damage, remove and replace damaged drywall, dry and dehumidify the area, and then restore the wall.
- While some water-damaged drywall can be repaired as a DIY job, significant water damage, advanced mold growth, and drywall that is no longer structurally sound require the help of a professional restoration company.
- Contact ServiceMaster Restoration by Zaba for comprehensive drywall replacement and restoration services.
Before You Get Started
- Safety first: Make sure to turn off the water source to prevent further damage. Additionally, make sure all electricity is turned off to avoid any electrical hazards. Before beginning work, make sure to wear gloves, eye protection, and a mask to prevent any injuries or exposure to harmful substances.
- Gather the necessary equipment: We recommend grabbing a high-powered wet/dry vacuum for removing standing water, fans or air movers to promote air circulation, and a dehumidifier to reduce moisture in the air. Additionally, having a moisture meter on hand can help in monitoring the drywall’s progress as it dries. It is also helpful to have a set of tools for any necessary drywall removal, such as a utility knife and pry bar. To get the right gear, you may need to rent it. For best results, explain your project to store personnel at an equipment rental facility, and ask about equipment specs. You want a dehumidifier that generates temperatures around 115 degrees Fahrenheit at no more than 14 percent relative humidity.
- DIY versus professional help: Evaluate whether you have the skills and knowledge to handle the drying process yourself or if it’s better to seek assistance from a professional. For minor damages, such as small water spots or slight swelling, a do-it-yourself approach can be effective. However, if the integrity of the drywall is compromised, evident by significant warping, crumbling, or extensive mold growth, it’s time to call in the professionals. They come equipped with advanced tools and expertise to restore your walls safely and effectively, ensuring that the structure of your home remains sound.
By keeping these points in mind, you can approach the task of drying out drywall after water damage more effectively and efficiently.
How To Dry Out Wet Drywall In 7 Easy Steps


1. Remove Furniture And Other Items From The Affected Area
Remove furniture, paintings, decorative items, and anything else that could get in the way of the restoration process.
This will allow you to have more space and access for drying out the drywall. It also prevents any potential damage to your belongings.
If there are cabinets in the affected area that cannot be removed, empty their contents and open the doors. If there are area rugs on the floor, pick them up to allow the space to dry.
2. Gauge The Extent Of The Damage
It’s easy to spot wet areas on wall surfaces, but how to tell if drywall is wet below the surface isn’t always obvious.
Trust your visual inspection to determine the general location of water damage, but gauge the extent of the problem with a moisture meter (or have a professional restoration company like ServiceMaster by Zaba perform a water damage inspection).
Any reading above 1 percent or out of the meter’s green zone indicates compromised drywall material.
3. Remove Molding And Baseboards
When water infiltrates the walls, it can seep into the gaps between the drywall and the molding or baseboards, causing further damage or leading to mold growth.
By removing the molding and baseboards, you create better access to the affected areas, allowing for thorough drying and preventing the spread of moisture.
Here’s how to do it:
- Start by gathering the necessary tools, such as a pry bar, utility knife, and hammer.
- Score the paint or caulk between the molding or baseboard and the wall using a utility knife. This will help prevent any additional damage to the walls.
- Position the pry bar behind the molding or baseboard and gently pry it away from the wall.
- Work your way along the length of the trim, applying pressure at intervals to gradually detach it. In some cases, you may need to use a hammer to lightly tap the pry bar for added leverage.
- Once the molding or baseboard is removed, carefully inspect the drywall for any signs of moisture or mold. If you notice any dampness or mold growth, it is essential to address it promptly to prevent further damage. Properly drying out the affected drywall is crucial to avoid structural issues and potential health hazards associated with mold.
- Remember to exercise caution and seek professional assistance if needed to handle extensive water damage or mold contamination.
4. Drain Standing Water In The Walls
Depending on the severity of the water damage, it is crucial to assess the condition of your wall, as it may contain a substantial amount of standing water.
To determine if there is water present, you can perform a simple test:
Take a drill and carefully make a small hole in the wall, approximately 2 inches off the ground. If water starts to come out of the hole, it indicates the presence of water within the wall.
In such cases, it is advisable to create additional holes along the wall to facilitate the draining of the water.
Before proceeding with the hole creation process, locate the studs within your wall. This can be done by using a stud finder. Identifying the studs will allow you to drill between them, ensuring stability and the best possible results.
When creating these drainage holes, it is important to keep a few things in mind.
- Maintain a consistent distance of about 2 inches (5.1 cm) off the ground for each hole.
- Additionally, it is recommended to space the holes between 16 and 24 inches (41 and 61 cm) apart to ensure effective drainage throughout the affected area.
By following these steps, you can effectively address water damage in your wall and take the necessary measures to prevent further issues.
5. Remove Damaged Drywall
Removing damaged drywall is a crucial step in restoring a home after incidents of water damage.
Here’s how to do it:
- Use a utility knife to score a line around the damaged section. This step helps in cleanly separating the damaged part from the intact drywall.
- Check for any electrical wiring or plumbing that may be present behind the wall before cutting or pulling the drywall away.
- Next, gently break the damaged drywall along the scored line and remove it. For larger sections, it may be necessary to use a pry bar to carefully remove the sections.
- Once the damaged portion has been removed, you can move on to measuring, cutting, and installing new drywall sections.
- If the damaged section of the wall has fiberglass insulation with paper backing, you may be able to use an inner-wall drying system to save the drywall. However, if the insulation is foil-backed fiberglass, blown-in cellulose, or Styrofoam, it cannot be effectively dried. In such cases, you’ll need to remove the damaged section of the wall along with the insulation. This allows for quick drying and helps prevent the growth of mold.
6. Dry And Dehumidify The Area
Make the room as airtight as possible by taping plastic sheeting over doorways and windows.
Fire up the equipment, keep a close eye on the dehumidifier’s collection well, and regularly check progress with your moisture meter. On average, it takes three days to completely dry wet drywall.
Keep in mind that you can also open windows, run your AC, or turn the heating up to dry the area, but you should not open windows or doors if you’re using a dehumidifier.
7. Restore The Wall
Put the moisture meter to work one last time to be certain that your sheetrock walls are completely dry.
When you’re confident that the job’s finished, paint over affected drywall with a thin coat of alcohol- or oil-based primer.
Feather into surrounding areas that don’t need repainting, and let dry. Repeat the prep process, and then finish off your now-saved drywall with a fresh coat of paint.
When To Call In The Professionals
If you address the dampness right away, you can usually dry out wet drywall with good results. If you’re facing extensive damage, call in a professional restoration company.
- Make sure you’ve uncovered the root cause of the water damage. When in doubt, call in an expert before things get worse.
- Drywall water damage can set up an environment that breeds toxic black mold. If anyone in your home deals with significant health issues, let certified specialists handle the drying process.
- Drywall that’s been soaked for days loses its structural integrity. In many cases, water-damaged drywall needs to be replaced. A water damage contractor handles recovery including drying procedures, material tear-out and complete restoration.
- If soaked sheetrock results from overhead flooding, you may be in danger of a ceiling collapse. Don’t risk your personal safety when dealing with drywall ceiling water damage. Call in a restoration company right away for a structural assessment.
- Water damage caused by sewage backup must be handled by certified professionals. This kind of job requires an industry-level understanding of biohazard cleanup.
Professional restoration companies tackle water damage in drywall with meticulous precision and cutting-edge technology.
Initially, they assess the extent of moisture intrusion using moisture meters and thermal imaging cameras to pinpoint the affected areas.
Next, they remove the saturated materials while preserving the undamaged sections to the extent possible. The experts then thoroughly dry out the space with industrial dehumidifiers and air movers, preventing mold growth and ensuring the structural integrity of the property.
Finally, they repair or replace the damaged drywall, seamlessly matching textures and paint for a restoration that returns the wall to its pre-damage condition.
Dealing With Water-Damaged Drywall In Chicago, Il Or Suburbs? We Can Help!
Whenever you need DIY solutions for water disaster cleanup at your home or business, always check in with us. From tackling a flooded basement to drying drywall after water damage, we’re here for you with solid information and actionable plans.
Whenever you feel overwhelmed by the size of a cleanup project, always call us first. You can count on ServiceMaster Restoration by Zaba for the very best water damage restoration in Chicago and the surrounding suburbs.
We stand ready to help you with water damage. Call us now: 773-647-1985.
FAQs
How long does it take for mold to grow on wet drywall?
Once it gets wet, porous drywall quickly becomes a breeding ground for mold growth. The process can take as little as 24 hours, but you might not see the damage for a week or more.
How long does it take to dry out damp drywall?
Once you’ve cleaned everything and set up drying equipment, be patient. Let fan and dehumidifiers run constantly for three days, and then check the drywall with a moisture meter.
Can wet drywall be dangerous?
Yes. Water-damaged drywall can become unstable. This is a serious safety concern when you’re dealing with soggy drywall ceilings. Wet drywall is also a breeding ground for mold that can aggravate existing health issues.


